Senin, 26 Januari 2015

Cacti Installation with Centos 6 Part1

Cacti is one of the best snmp based monitoring software. I’ll show you how to install and configure it on Hyper-V.
I’ve already posted couple of articles about CentOS 6 installation on Hyper-V, so I won’t mention about that again.
You can see CentOS 6 installation on Hyper-V at the following posts:
So I assume you have a CentOS 6 with Hyper-V LIS v3.1. So lets continue with Cacti installation.
Cacti requires that the following software is installed on your system.
1. Apache
2. PHP 5.x
3. MySQL 5.x
4. RRDTool 1.2.x
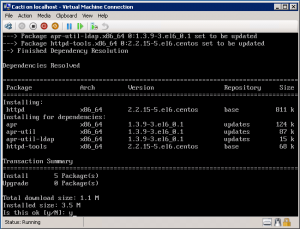
It’s time to install Apache on CentOS 6.
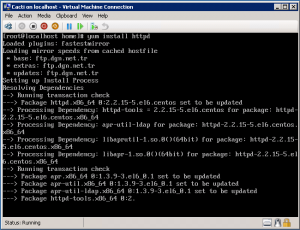
yum install httpd

Type “y” and press Enter to accept installation.

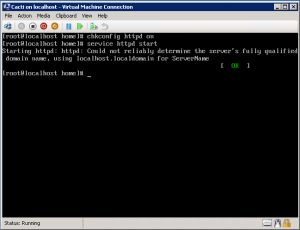
Now, start the Apache/httpd.
1
2
chkconfig httpd on
service httpd start

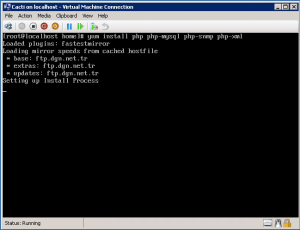
Now let’s install PHP.
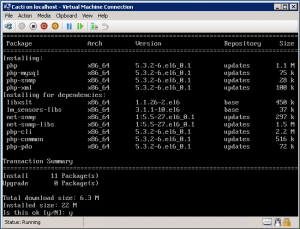
yum install php php-mysql php-snmp php-xml

Type “y” and press Enter to accept installation.

Now we will install MySQL.
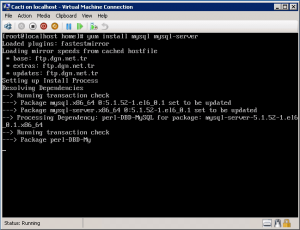
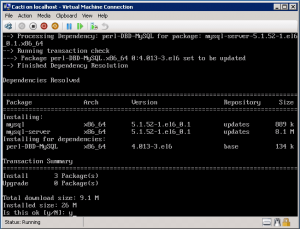
yum install mysql mysql-server

Type “y” and press Enter to accept installation.

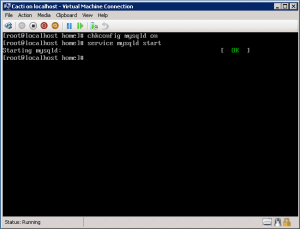
Now, start the MySQL/mysqld.
1
2
chkconfig mysqld on
service mysqld start

It’s time to install last component, RRDTools. First, we need to install required dependencies.
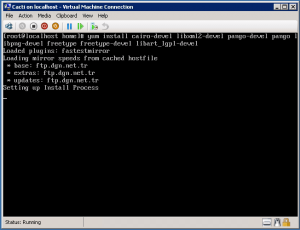
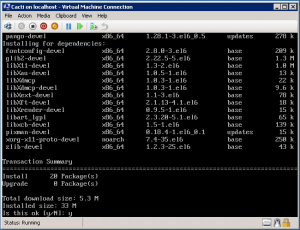
yum install cairo-devel libxml2-devel pango-devel pango libpng-devel freetype freetype-devel libart_lgpl-devel

Type “y” and press Enter to accept installation.

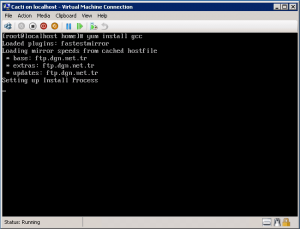
Install gcc to compile RRDTool.
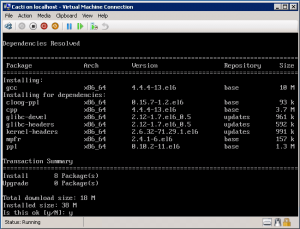
yum install gcc

Type “y” and press Enter to accept installation.

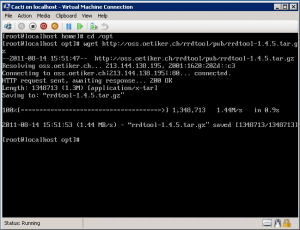
Download latest RRDTool.
1
2
cd /opt/
wget http://oss.oetiker.ch/rrdtool/pub/rrdtool-1.4.5.tar.gz

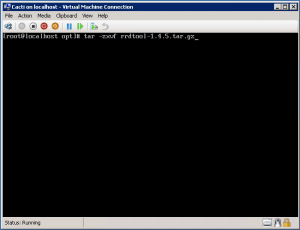
Untar tar ball.
1
2
tar -zxvf rrdtool-1.4.5.tar.gz
cd rrdtool-1.4.5

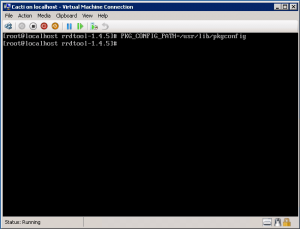
You need to set PKG_CONFIG_PATH.
PKG_CONFIG_PATH=/usr/lib/pkgconfig/

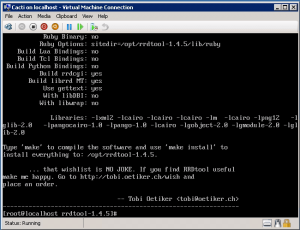
Now let’s configure and install RRDTool.
1
2
3
./configure
make
make install

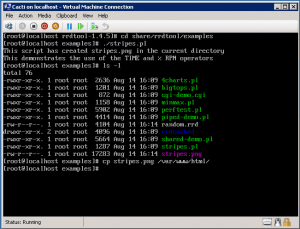
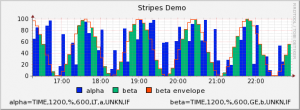
After installation is completed, let’s test RRDTool.
1
2
3
4
cd /usr/local/rrdtool/share/rrdtool/examples/
./stripes.pl
ls -l
cp stripes.png /var/www/html/

Lets see our test graph:

We finished installation of required components for Cacti. Next part, we will see how to install and configure Cacti.
You can continue with Part 2:

Cacti Installation with Centos 6 Part2

First part, we installed required components for Cacti. In this part, we’ll install and configure Cacti.
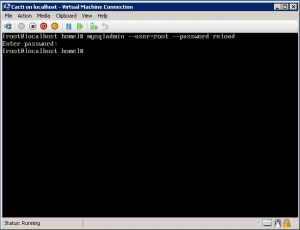
After MySQL installation, first we should set MySQL root password.
1
2
mysqladmin --user=root password p@ssw0rd!
mysqladmin --user=root --password reload

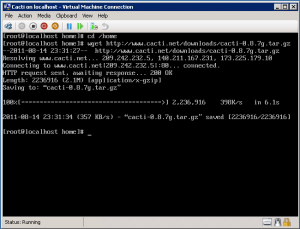
Let’s download latest Cacti release.
1
2
cd /home
wget http://www.cacti.net/downloads/cacti-0.8.7g.tar.gz

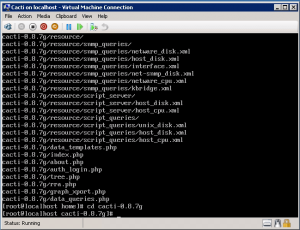
Untar tar ball.
1
2
tar -zxvf cacti-0.8.7g.tar.gz
cd cacti-0.8.7g

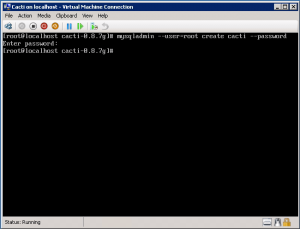
Create the MySQL database for Cacti. You have to type your root password to create database.
mysqladmin --user=root create cacti --password

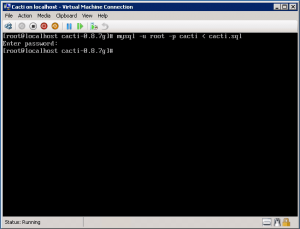
Import the default Cacti database.
mysql -u root -p cacti < cacti.sql

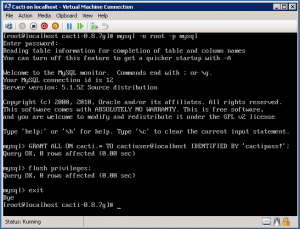
Create a MySQL username and password for Cacti for security reasons.
1
2
3
4
mysql -u root -p mysql
GRANT ALL ON cacti.* TO cactiuser@localhost IDENTIFIED BY 'cactipass!';
flush privileges;
exit

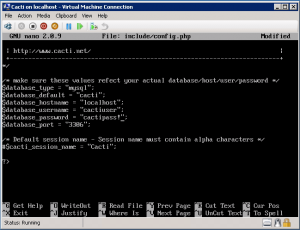
Edit “include/config.php” and specify the database type, name, host, user and password for your Cacti configuration.
nano include/config.php
$database_type = “mysql”;
$database_default = “cacti”;
$database_hostname = “localhost”;
$database_username = “cactiuser”;
$database_password = “cactipass!”;

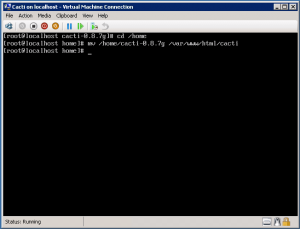
Move Cacti files into /var/www/html for web access.
1
2
cd /home
mv /home/cacti-0.8.7g /var/www/html/cacti

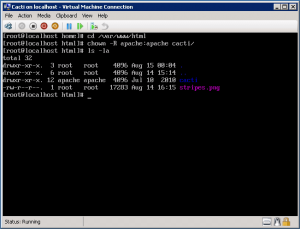
Go into Cacti directory and set the appropriate permissions for graph/log generation.
1
2
cd /var/www/html
chown -R apache:apache cacti

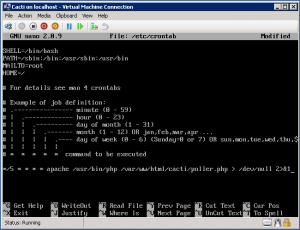
Add a line to your ”/etc/crontab” file.
nano /etc/crontab
*/5 * * * * cactiuser /usr/bin/php /var/www/html/cacti/poller.php > /dev/null 2>&1

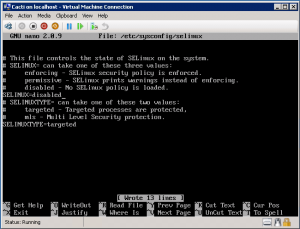
Disable SeLinux to web restrictions.
nano /etc/sysconfig/selinux
SELINUX=disabled

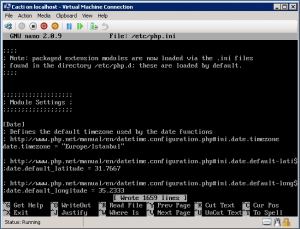
Reboot your server to apply changes. After reboot, go to php.ini configuration and change timezone.
nano /etc/php.ini
date.timezone = “Europe/Istanbul”

We finished Cacti installation. Now go to your web browser and connect to http://yourserverip/cacti.

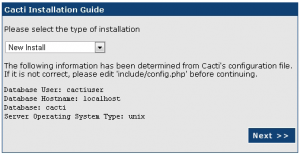
Choose “New Install” and click next.

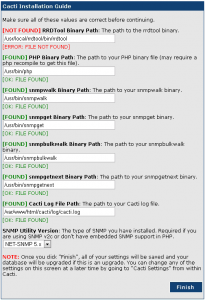
Correct RRDTool default path.
RRDTool Binary Path: /usr/local/rrdtool/bin/rrdtool

Now Cacti is online!

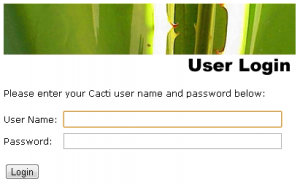
You can login to Cacti with default username and password. After your first login, you should change password.
username: admin
password: admin
Now you can start adding your graphs :)

Tutorial SMS Gateway Centos 6

Install dan configure gammu di CentOS 6

Meskipun aplikasi SMS gateway gammu ini termasuk yang jadul, tapi terkadang dibutuhkan juga untuk broadcast sms atau membuat aplikasi yang mengirim sms menggunakan daemon pada sistem operasi seperti linux atau windows. Kali ini kebetulan saya install gammu pada CentOS 6.

Persiapan Environment

Dibutuhkan beberapa paket compiler. Install paket developer CentOS
yum groupinstall 'Development Tools'
Gammu memerlukan CMAKE untuk compiler nya. Untuk itu download terlebih dahulu cmake dari link berikut.
# tar -xzvf cmake-2.8.7.tar.gz
# cd cmake-2.8.7
# ./configure
# gmake
Tes cmake dengan command berikut
# cmake

Instalasi dan konfigurasi gammu

Instalasi perangkat keras

Sebelum melakukan konfigurasi, persiapkan terlebih dahulu modem GSM yang akan digunakan. Dalam kasus ini saya menggunakan modem GSM Wavecom fastrack di bawah.
http://www.satuportal.net/system/files/u349/Modem_Wavecom_Fastrack_1306B_Rs232_190410100430_ll.jpg.jpg
Kalau ingin bermain-main dengan 3G bisa pake wavecom supreme. Mungkin lain kali ngoprek2 dikit.
Karena koneksi menggunakan serial, maka konfigurasi gammu menggunakan tipe serial dengan model at.

Instalasi perangkat lunak gammu

Setelah environment selesai dipersiapkan, lanjut install gammu. Saya menggunakan source stable yang terbaru dari web gammu
# wget http://sourceforge.net/projects/gammu/files/gammu/1.31.0/gammu-1.31.0.tar.gz
# tar -xzvf gammu-1.31.0.tar.gz
# cd gammu-1.31.0
# ./configure
# make install
Jika tidak ada kesalahan, tes instasi dengan command :
# gammu
Jika terdapat kesalahan “gammu: error while loading shared libraries: libGammu.so.7: cannot open shared object file: No such file or directory” tinggal tambahkan libGammu di /usr/lib/
# ln -s /usr/local/lib/libGammu.so /usr/lib/libGammu.so.7
# ln -s /usr/local/lib/libgsmsd.so /usr/lib/libgsmsd.so.7
Jika memakai mesin 64bit :
# ln -s /usr/local/lib64/libGammu.so /usr/lib64/libGammu.so.7
# ln -s /usr/local/lib64/libgsmsd.so /usr/lib64/libgsmsd.so.7

Konfigurasi gammurc

Konfigurasi gammu menggunakan gammurc. Untuk melakukan konfigurasi ini cukup mudah, tinggal masukan command :
# gammu-config
Konfigurasi seperti di bawah
│ P Port (/dev/ttyS0) │
│ C Connection (at115200) │
│ M Model (at) │
│ D Synchronize time (yes) │
│ F Log file (/var/log/gammu/gammurc) │
│ O Log format (textalldate) │
│ L Use locking () │
│ G Gammu localisation () │
│ H Help │
│ S Save
Buatlah file log :
# mkdir /var/log/gammu
# touch /var/log/gammu/gammurc
Tes konfigurasi :
# gammu --identify

Device : /dev/ttyS0
Manufacturer : Wavecom
Model : MULTIBAND 900E 1800 (MULTIBAND 900E 1800)
Firmware : 651b09gg.Q2406B 244 041410 13:45
IMEI : 351047880291824
SIM IMSI : 510080091331519
Jika keluar data di atas, maka konfigurasi berhasil.

Konfigurasi gammu-smsd

Daripada menggunakan gammurc, untuk mempermudah integrasi dengan aplikasi seperti web dan database, konfigurasi gammu-smsd lebih baik digunakan.
Buat file konfigurasi. Copy file konfigurasi minimal :
# cp /usr/src/gammu-1.31.0/docs/config/smsdrc /etc/gammu-smsdrc
Buat database sms, import database mysql kemudian konfigurasi gammu-smsdrc
# mysql -u root -p
> create database sms;
> \q

# nano /etc/gammu-smsdrc

[gammu]
device = /dev/ttyS0
model = at115200
connection = at

[smsd]
service = mysql
PIN = 1234
logfile = /var/log/gammu/smsdlog
debuglevel = 1
#runonreceive = /some/script
commtimeout = 30
sendtimeout = 30user = <user_database>
password = <password>
pc = localhost
database = sms
Import mysql :
# mysql -u root -p sms < /usr/src/gammu-1.31.0/docs/sql/mysql.sql
Jalankan daemon gammu-smsd dengan command :
# gammu-smsd --daemon
Log filename is "/var/log/gammu/smsdlog"
Cek log file :
# tail -f /var/log/gammu/smsdlog
Pastikan tidak ada error pada log tersebut.

Konfiguras kalkun sebagai web interface sms daemon

Salah satu kelebihan kalkun adalah menggunakan mysql yang dijalankan oleh daemon gammu-smsd.
Download kalkun dari http://sourceforge.net/projects/kalkun/files/kalkun/0.4/kalkun_0.4.tar.gz/download
Masukan ke web server apache di /var/www/html/sms
# mkdir /var/www/html/sms
# mv kalkun_0.4.tar.gz /var/www/html/sms
# tar -xzvf  kalkun_0.4.tar.gz
# chown -R apache.apache /var/www/html
Konfigurasi database kalkun :
# nano application/config/database.php
Setting database gammu
1
2
3
4
5
6
$db['default']['hostname'] = &quot;localhost&quot;;
// MySQL
$db['default']['username'] = &quot;&quot;;
$db['default']['password'] = &quot;&quot;;
$db['default']['database'] = &quot;sms&quot;;
$db['default']['dbdriver'] = &quot;mysql&quot;;
Buka web browser, kemudian ketik http://<ip_addres(hostname)_server>/sms
Lakukan konfigurasi dengan next->next
Setelah selesai, hapus / rename folder install pada root web nya.
# mv install install_bak
Ubah settingan sms daemon agar menjalankan script saat mendapatkan sms masuk.
# nano /etc/gammu-smsdrc
runonreceive = /var/www/html/sms/scripts/daemon.sh
Edit file daemon tersebut beserta daemon.php pada folder scripts
# cd /var/www/html/sms/scripts
# nano daemon.sh
DAEMON=/var/www/html/sms/scripts/daemon.php
# nano daemon.php
$url = "http://<IP_Address/Hostname>/sms";
Restart daemon gammu-smsd dengan kill PID gammu-smsd, kemudian jalankan kembali gammu-smsd –daemon (solusi sementara)
Masuk ke aplikasi dengan user kalkun dan password kalkun
Silakan setting2 sendiri saja :)

Instalasi LTSP (Linux Terminal Server Project) Thin Client

How to install LTSP (Linux Terminal Server Project) on Ubuntu Server

Overview

I've had a lot of people ask me how I achieved my thin client setup so I thought it's about time I added a guide or two! This particular guide will show you how to create thin Ubuntu Clients. Later guides will show you how to run MS Windows thin clients.
Whilst there are plenty of other LTSP guides out there on the internet they fell short of being helpful to me in 3 ways:
  • They assume your starting point is from a full-blown Ubuntu gnome desktop. Mine isn't, I'm running a headless 64bit Ubuntu Server.
  • They assume your server has two NICSs. Mine doesn't, it only has the one.
  • They assume your Ubuntu desktop/server is performing DHCP duties for your whole network. My ADSL router does that on mine.
So, if you're running a headless server with a single NIC and your router performs the DHCP duties for your network then you might find this guide helpful.
NOTE: If you're jumping into this site here then it's worth mentioning that this guide has been written for Lucid Lynx 10.04 but it may well work on earlier or later versions of Ubuntu.
TIP: If you're going to be following this guide step by step using Putty then you can save yourself some typing by simply highlighting each command below, right-clicking on it and selecting Copy. Then toggle over to your Putty Session and right-click once more. The command you've just copied from here will be automatically pasted into your Putty Session.

Give your server a Fixed IP Address

There are two ways to do this. The first way is called IP Address Reservation. Address Reservation is where you tell your router to always give your server the same IP address. The second way is what's commonly called a Static IP Address. This is where you change the settings on your server to tell the server not to obtain an IP address from your router but to instead always use the one you've hard coded. It is important that you make sure that this static IP address is outside the range issued by your router otherwise you might find you router giving this address to another device on your network. This would not be helpful!
Obviously I can't document here how to change the settings on your particular router to reserve an address for your server so I'll just cover the latter, assigning a static IP address to your server.
If you've been following my guides then you'll already have a static IP address for your server. And if you've been following ALL my guides then you'll also be running KVM which means you'll be running your NIC as a network bridge so you can omit this step in either case.
So, in a Putty session type or paste the following command:
sudo vim /etc/network/interfaces
By default your file should look like this:
# This file describes the network interfaces available on your system
# and how to activate them. For more information, see interfaces(5).

# The loopback network interface
auto lo
iface lo inet loopback

# The primary network interface
auto eth0
iface eth0 inet dhcp
We need to edit the last two lines and add a few more. The settings you will use depend on your own network environment so you'll obviously need to use your own values rather than just paste mine! Once done your file should look like something like this. The # character masks a line out so it does not get executed:
# This file describes the network interfaces available on your system
# and how to activate them. For more information, see interfaces(5).

# The loopback network interface
auto lo
iface lo inet loopback

# The primary network interface
#auto eth0
#iface eth0 inet dhcp
auto eth0
iface eth0 inet static
        address 192.168.1.200
        netmask 255.255.255.0
        network 192.168.1.0
        broadcast 192.168.1.255
        gateway 192.168.1.254
        dns-nameservers 192.168.1.254
        dns-search home
 When you're done editing the file press the [Esc] key once and type the following:
:wq
This should save the changes and bring you back to the command line. If you make a mistake then issue :q! instead of :wq to abort your changes.

Install LTSP

Now we need to install LTSP. We do this by issuing the following command:
sudo apt-get install ltsp-server-standalone

Edit the dhcpd.conf file to suit your environment

This is probably the trickiest part to get right since the settings you use will depend on your own environment. However I'll explain what settings I changed (shown in red below) so you should be able to adjust this file to suit your network. First off, let's open the dhcpd.conf file for editing by issuing the following command:
sudo vim /etc/ltsp/dhcpd.conf
By default the file should look like this:
# Default LTSP dhcpd.conf config file.
#

authoritative;

subnet 192.168.0.0 netmask 255.255.255.0 {
        range 192.168.0.20 192.168.0.250;
        option domain-name "example.com";
        option domain-name-servers 192.168.0.1;
        option broadcast-address 192.168.0.255;
        option routers 192.168.0.1;
#      next-server 192.168.0.1;
#      get-lease-hostnames true;
        option subnet-mask 255.255.255.0;
        option root-path "/opt/ltsp/i386";
        if substring( option vendor-class-identifier, 0, 9 ) = "PXEClient" {
                filename "/ltsp/i386/pxelinux.0";
        } else {
                filename "/ltsp/i386/nbi.img";
        }
}
If you're currently viewing this guide using a Windows machine connected to your router and your machine has been assigned an IP address via DHCP then issue the ipconfig /all command in a Command Prompt to see what settings you're currently using. Alternatively you can obtain the required settings from your router interface.
Change the first three sets of numbers of the subnet to match your IP address. The IP address of the machine I'm using currently is 192.168.1.112 so I'd change the subnet value above from 192.168.0.0 to 192.168.1.0
For the range you need to make sure you set these to be outside the DHCP range dished out by your router. My router issues IP addresses from 192.168.1.64 to 192.168.1.253 so I had to firstly change my router to issue address in the range 192.168.1.64 - 192.168.1.199. I then set the range in the dhcpd.conf file to be 192.168.1.202 to 192.168.1.253 (my servers are using .200 & .201)
Set the option domain-name-servers to be the same as the IP address of your router. In my case this is 192.168.1.254. Note, this would be the value of your "DHCP Server" in the output from your ipconfig /all command.
Set the option broadcast-address so the first 3 sets of numbers are the same as the subnet setting plus the 255. So, 192.168.1.255
Set the option routers to be the same as the option domain-name-servers.
All other settings can remain the same.
Here's mine. The red indicates the values which are different from the defaults:
#
# Default LTSP dhcpd.conf config file.
#

authoritative;

subnet 192.168.1.0 netmask 255.255.255.0 {
        range 192.168.1.202 192.168.1.250;
        option domain-name "example.com";
        option domain-name-servers 192.168.1.254;
        option broadcast-address 192.168.1.255;
        option routers 192.168.1.254;
#        next-server 192.168.0.1;
#        get-lease-hostnames true;
        option subnet-mask 255.255.255.0;
        option root-path "/opt/ltsp/i386";
        if substring( option vendor-class-identifier, 0, 9 ) = "PXEClient" {
                filename "/ltsp/i386/pxelinux.0";
        } else {
                filename "/ltsp/i386/nbi.img";
        }
}
When you're done editing the file press the [Esc] key once and type the following:
:wq
This should save the changes and bring you back to the command line. If you make a mistake then issue :q! instead of :wq to abort your changes.

Restart the DHCP server on the host

We should now restart the DHCP server by issuing the following command. With any luck we'll see an [OK] to say the DHCP server successfully started:
sudo /etc/init.d/dhcp3-server restart

Build the LTSP environment and the client image

Now we're done configuring the basics let's build the LTSP environment and client image by issuing the following command. This will take some time so be patient. Note, the command will build a 32bit image. If you want to build a 64bit image (which is obviously not recommended if your thin clients don't support it) then omit the "--arch i386" from the command below:
sudo ltsp-build-client --arch i386
This will churn through for quite some time but eventually you should see info: LTSP client installation completed successfully displayed at the bottom of the screen. Now it's time to reboot the host server:
sudo reboot -h now

Time to boot up a Thin Client

Once the host server has rebooted we should now be able to boot our thin client and be presented with the Ubuntu Thin Client logon screen as shown below:
Once you've typed in your username and password you should see a black box (which is actually a Terminal session) appear at the top left corner of the login screen. This is because we've not yet installed a GUI on our LTSP server but carrying out this step does at least show that our basic setup is working properly. Type exit in the Terminal session to quit back to the login screen. Then on the login screen click on Preferences in the bottom left-hand corner of the screen and choose Shutdown.
NOTE: If you've previously followed my VNC guide then you'll be presented with the core gnome desktop rather than a Terminal Session. In which case select Log Out from the System menu before selecting the Preferences option on the Thin Client login screen to Shutdown the thin client.

How to configure LTSP (Linux Terminal Server Project) on Ubuntu Server

In the How to Install LTSP guide we covered how to install LTSP and build the basic client image. We'll now cover how to configure it by firstly installing a full-blown Ubuntu Gnome desktop.

Configure the LTSP environment

The first thing we want to do is expand the list of available package sources from the default list since they are quite limited and secondly to bring our LTSP environment up to date. So issue the following command to copy the source list from the host machine (our server) to the LTSP environment:
sudo cp /etc/apt/sources.list /opt/ltsp/i386/etc/apt/sources.list
During this process it's possible Ubuntu will try to stop and start services as it goes along so we'll prevent this from happening by issuing the following command:
export LTSP_HANDLE_DAEMONS=false
The LTSP environment lives in a separate part of Ubuntu. This means we can add and remove packages in this environment independent of the host machine. So, let's switch into this LTSP environment:
sudo chroot /opt/ltsp/i386
and mount the proc filesystem:
mount -t proc proc /proc
Now let's bring the LTSP environment up to date. Note we are omitting the normal "sudo" prefix from these commands because we're already running as root:
apt-get update
aptitude safe-upgrade
Lastly let's install an Ubuntu Desktop GUI for our LTSP clients:
apt-get install ubuntu-desktop
You might also want to install openoffice and firefox
apt-get install openoffice.org firefox flashplugin-installer

Add an admin user account

Now we have installed the Ubuntu desktop we need to set up an admin user. This is because the existing admin user on our host machine does not get transferred across to this LTSP environment. I used the same credentials for this admin user as on the one on my main server but it's not compulsory, just easier to remember!:
useradd -m adminusername -G sudo
replacing adminusername with the required name of your admin user
Now set the password for this account and type the password when prompted:
passwd adminusername
replacing adminusername with the required name of your admin user. Now add this new user to sudoers file:
visudo
Press the [Insert] key once and insert a blank line after the "%sudo ALL=(ALL) ALL" line and paste the following:
adminusername ALL=(ALL) ALL
replacing adminusername with the required name of your admin user.
When you're done editing the file press the [Esc] key once and type the following:
:wq
This should save the changes and bring you back to the command line. If you make a mistake then issue :q! instead of :wq to abort your changes.
Now exit out of chroot:
exit
And unmount the proc filesystem
sudo umount /opt/ltsp/i386/proc
Whenever you make any changes to your LTSP environment it's always a good idea to run the following commands:
sudo ltsp-update-sshkeys
sudo ltsp-update-kernels
sudo ltsp-update-image --arch i386
The first one MUST be run whenever you change any IP settings. The second one updates the kernel if required and the last one rebuilds the LTSP client image to take account of any packages you've updated.
You should now be able to launch a thin client and once logged on be presented with a full-blown Gnome desktop environment. Enjoy!


Instalasi Cacti Network Monitoring di Centos 5.2

Instalasi dan konfigurasi Cacti di Centos 5.2


Apa itu cacti?
Cacti adalah salah satu aplikasi open source yang menrupakan solusi  pembuatan grafik network yang lengkap yang didesign untuk memanfaatkan kemampuan fungsi RRDTool sebagai  peyimpanan data dan pembuatan grafik. Cacti menyediakan pengumpulan data yang cepat, pola grafik advanced, metoda perolehan multiple data, dan fitur pengelolaan user. Semuanya dikemas secara intuitif, sebuah interface yang mudah digunakan  mudah dipahami untuk local area network hingga network yang kompleks dengan ratusan device. Dengan menggunakan cacti kita dapat memonitor trafik yang mengalir pada sebuah server.
Paket-paket yang di butuhkan sebelum menginstal cacti:
1. php-snmp
2. rrdtool
3. net-snmp & net-snmp-utils
4. httpd
5. php
6. php-mysql
7. mysql
8. mysql-server
Install paket-paket pendukung:
[root@heri ~]# yum install httpd php mysql php-mysql mysql-server
[root@heri ~]# yum install php-snmp net-snmp net-snmp-utils rrdtool
Tahap-tahap instalasi CACTI:
1. Buat user untuk menjalankan database cacti
[root@heri ~]# groupadd cacti
[root@heri ~]# useradd -g cacti cactiuser
[root@heri ~]# passwd cactiuser
Changing password for user cactiuser.
New UNIX password: cactipassword
Retype new UNIX password: cactipassword
passwd: all authentication tokens updated successfully.
2. Download terlebih dahulu paket cacti nya:
[root@heri ~]# wget http://www.cacti.net/downloads/cacti-0.8.7b.tar.gz
3. Ekstrak hasil downloadan tersebut dan hasil ekstrakan letakkan di direktori apache anda.
[root@heri ~]# tar xzvf cacti-0.8.7b.tar.gz -C /var/www/html/
4. Pindah direktori ke direktori apache anda.
[root@heri ~]# cd /var/www/html/
5. Rubah nama forder cacti-0.8.7b menjadi cacti
[root@heri html]# mv cacti-0.8.7b cacti
6. Buat database untuk cacti dengan nama “cacti”.
[root@heri html]# mysqladmin -u root -p create cacti
7. Pindah ke direktori cacti
[root@heri html]# cd cacti/
8. Buat tabel-tabel untuk database cacti dengan mengimporkan file “cacti.sql” ke database cacti.
[root@heri cacti]# mysql -u root -p cacti < cacti.sql
9. Sekarang buat user yang nantinya akan mengelola database cacti.
[root@heri cacti]# mysql -u root -p
mysql> GRANT ALL ON cacti.* TO cactiuser@localhost IDENTIFIED BY 'cactipassword';
mysql> flush privileges;
10. Kemudian edit file konfigurasi cacti yang terletak di folder “/var/www/html/cacti/include/config.php”.
[root@heri cacti]# vi include/config.php
/* make sure these values refect your actual database/host/user/password */
$database_type = "mysql";
$database_default = "cacti";
$database_hostname = "localhost";
$database_username = "cactiuser";
$database_password = "cactipassword";
$database_port = "3306";
Sesuaikan konfigurasi di atas dengan user dan password yang akan menjalankan database cacti anda.
11. Sekarang rubah kepemilikan user dari folder “rra” dan “log”.
[root@heri cacti]# chown -R cactiuser rra/ log/

12. Sekarang saatnya membuat crontab untuk cacti.
[root@heri html]# crontab -e
*/5 * * * * /usr/bin/php /var/www/html/cacti/poller.php
13. Langkah selanjutnya adalah test apakah instalasi cacti berhasil atau tidak menggunakan browser anda.
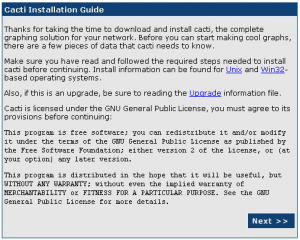
Arahkan browser anda ke http://ip_komputer_anda/cacti, jika yang muncul adalah halaman instalasi cacti berarti proses instalasi berjalan dengan lancar. Seperti gambar di bawah ini, Click Next untuk melanjutkan:
14. Setelah anda click tombol next, maka akan muncul gambar seperti dibawah ini. Click next lagi untuk melanjutkan.
15. Setelah anda click tombol “Next” maka kemudian akan muncul gambar seperti dibawah ini
Pastikan bahwa semua path binary sudah di temukan atau tertulis “FOUND”. Jika masih ada yang error maka pastikan lagi tidak ada langkah yang terlewatkan.
16. Setelah proses instalasi selesai maka akan muncul halaman login cacti, anda dapat login dengan menggunakan username=admin dan password=admin. Seperti gambar di bawah ini:

17. Setelah anda berhasil login maka akan muncul halaman untuk mengganti password admin anda, silahkan ganti sesuai dengan keinginan anda, ini dilakukan demi keamanan server anda.

18. Terakhir, setelah anda merubah password untuk user admin anda maka anda akan menuju ke halaman index untuk user admin. Silahkan edit sesuai dengan kebutuhan anda.

Automatic Failover dengan Mikrotik

Automatic Failover dengan Mikrotik

September 23, 2008
Setelah posting di forum tidak ada  yang reply, akhirnya script automatic failover di MT V.3x berhasil saya terapkan.
Script ini diambil dari sini, akan tetapi saya rubah sedikit, karena belum jalan di mikrotik saya.
Sebelumnya saya akan terangkan skenario-nya,
ISP 1 ————– |            |
                            |  Mikrotik | ========= LAN
ISP 2 ————– |            |
Sebuah Mikrotik terhubung dengan 2 ISP (WAN), ISP 1 sebagain main link, sedangkan ISP 2 sebagai backup link. Bila ISP 1 down, maka routing internet akan ke ISP 2, jika ISP 1 up kembali, routing kembali ke semula.
Setelah semua dikonfigurasi secara standar, Berikut adalah step2-nya :
1. Beri nilai 1 untuk distance di routing utama (main link), dan nilai 2 untuk routing backup.
2. Define IP Public luar yang bisa di monitoring, misal saya ambil 172.16.64.13 sebagai ip netwatch saya, kemudian tmbahkan routing ke ip tersebut melalui main link.
Misal :
ISP 1 = ADSL
ISP 2 = Cable/IM2

3. Tambahkan script berikut yang berfungsi script fail over dan ip monitoring :
==============================================================
/system script add name=”failover” source={
:if ([/ip route get [/ip route find comment=”utama”] disabled]=”yes”) do={/ip route enable [/ip route find comment=”utama”]} else={/ip route disable [/ip route find comment=”utama”]}
/system script add name=”back2main” source={
:if ([/ip route get [/ip route find comment=”utama”] disabled]=”yes”) do={/ip route enable [/ip route find comment=”utama”]}
/tool netwatch add host=172.16.64.13 interval=10s timeout=1s down-script=”failover”
/tool netwatch add host=172.16.64.13 interval=10s timeout=1s up-script=”back2main”

pemberian interval dan timeout silahkan disesuaikan dengan kebutuhan jaringan anda.
keterangan :
Monitoring ke ip 172.16.64.13 setiap 10 detik, bila dideteksi down maka failover script yang berfungsi untuk mendisable routing utama yang aktif, dan sebaliknya, bil ip tersebut up kembali maka mikrotik akan menjalan script back2main untuk meng-enable-kan routing utama.
Silahkan dicoba…..

Repair Hardisk bad sector menggunakan Victoria Software

Service / Repair Harddisk Bad Sector Dengan Victoria

Service harddisk, hardisk, atau hdd itu gampang-gampang susah, apalagi kalau kerusakannya dalam bentuk bad sector sudah parah sekali. Maka dari itu sebelum harddisk itu benar-benar menjadi rusak, data sebaiknya dibackup. Harddisk rusak biasanya diawali dengan terjadinya bad sector. Sebagai indikasi harddisk sudah mulai ada bad sector, kinerja windows semakin lambat, sering gagal (hang) masuk ke sistem windows, dan ada bunyi aneh yang tidak biasanya pada harddisk (krek.. krek.. krek.. biasanya cukup jelas terdengar). Jika ini telah terjadi, segeralah backup data Anda, dan segera cek apakah sudah terjadi bad sector yang parah sebelum harddisk benar-benar rusak dan kehilangan identitasnya (no detect).

Untuk memperbaikinya, mudah-mudahan masih bisa, bad sectornya belum parah benar, kita bisa service harddisk dengan menggunakan Freeware Victoria For Dos, atau Victoria For Windows. Saya sih lebih suka menggunakan Victoria For Dos, atau Victoria yang terdapat di dalam Hiren's BootCD. Nanti saya upload Victorianya. OK.. Trims

Download Victoria Tool Repair Bad Sector

Sekarang sudah bisa didownload Victorianya
Download VCR352-3
Download VCR40Free
Download VCR43Win
Download VCR446Free
Download Disk Manager For All
Download HDD Repair 2.0
(Mirip PC3000, bisa buat nge flash hdd Maxtor, WD, Fujitsu, Samsung)
Download HP USB Disk Storage Format Tool 2.0 (Buat Flashdisk Yang Nakal)
Download Smart Partition Recovery

Cara Menggunakan Victoria Repair Harddisk Bad Sector

Oh ya, sedikit tambahan, mungkin ada yang belum tahu menggunakan Victoria. Yang akan saya jelaskan Victoria For Dos...


Photobucket


  • Pasang harddisk yang akan diperbaiki bad sectornya pada secondary master port IDE
  • Siapkan Victoria, boleh dari harddisk master, floppy, cdrom, atau apa aja
  • Hidupkan CPU
  • Setelah sistem siap / ready, jalankan Victoria
  • Setelah masuk ke program Victoria, tekan tombol P, pilih Secondary Master
  • Tekan F2, untuk mendeteksi harddisk yang akan diperbaiki tsb
  • Kadang-kadang harddisk belum ready, tekan F3 (Reset), lalu tekan F2
  • Tekan F4, untuk menampilkan menu perintah scanning harddisk

HDD scan menu:
  • Start LBA: 0
  • End LBA: 60058656 (saya ingin memperbaiki harddisk 30 GB)
  • reading sequential
  • bad blocks ignore
  • change end of test

Pada posisi menu seperti di atas, Anda bisa langsung tekan F4, untuk scanning tanpa memperbaiki.

Untuk memperbaiki bad sector,
Langkah 1:
  • bad blocks ignore, ubah dengan menekan spasi menjadi advanced bb remap
  • Lalu tekan F4, untuk scanning sekaligus memperbaiki atau meremap bad sector

Jika ada sector yang gagal / sulit diperbaiki atau diremap
Langkah 2:

  • reading sequential ubah dengan menekan spasi menjadi erasing write
  • Lalu tekan F4, perintah Write (erasing) ini juga akan menghapus data-data di harddisk

Jika masih sulit juga, coba langkah 3 ini:
  • reading sequential
  • 256 bb erase
  • Lalu tekan F4

Start LBA dan End LBA dapat diubah-ubah nilainya dengan disesuaikan posisi LBA yang bad. Jika bad sector belum parah-parah benar, biasanya langkah 1 dan 2 sudah cukup. Yang harus diperhatikan, backuplah data-data terlebih dahulu, sebelum Anda menjalankan Victoria. Dikhawatirkan lupa, dijalankan Write (erasing) yang berakibat data hilang.

Setelah proses scanning selesai, bad sector berhasil diperbaiki, tekan tombol S (Stopping drive)
Tekan X, keluar (Exit)
Shutdown/Restart CPU

service harddisk, service hard disk, service hardisk, service hdd, service harddisk, service hard disk, service hardisk, service hdd, service harddisk, service hard disk, service hardisk, service hdd.

By: Mutiara Comp