Objectives:
- Install Oracle Java / JRE in Ubuntu 12.04 (Precise Pangolin)
- Enjoy!
sudo apt-get purge openjdk*

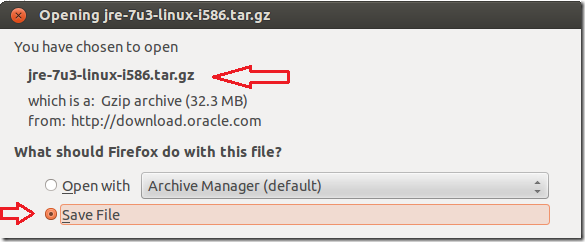
After that, go and download Java JRE package from here. When prompted, save the download. Please select the 32 or 64 bit .tar.gz version file from the list.

After saving the file, go back to your terminal and run the below commands to extract the java packages you downloaded.
tar -xvf ~/Downloads/jre-7u3-linux-i586.tar.gz

Next, create your java 7 folder by running the commands below.
sudo mkdir -p /usr/lib/jvm/jre1.7.0

Then move all the extracted files and folders into the java 7 folder.
sudo mv jre1.7.0_03/* /usr/lib/jvm/jre1.7.0/

Next, run the commands below to install / update java 7
sudo update-alternatives --install /usr/bin/java java /usr/lib/jvm/jre1.7.0/bin/java 0

Next, create a plugin folder in your home directory by running the commands below.
mkdir ~/.mozilla/plugins

Finally, link the java plugin to your profile.
ln -s /usr/lib/jvm/jre1.7.0/lib/i386/libnpjp2.so ~/.mozilla/plugins/

That’s it! Enjoy!

If your system profile is AMD64, then link java to your profile by running the commands below.
ln -s /usr/lib/jvm/jre1.7.0/lib/amd64/libnpjp2.so ~/.mozilla/plugins/

Tidak ada komentar:
Posting Komentar